
Photo by Felix Mittermeier on Unsplash
Exporting to iOS using Godot can be a little tricky. At first glance, the Godot documentation for exporting to iOS seems detailed enough. In fact, it is -- nothing is technically wrong.
Part of what might add to the challenge, is not wanting to pay for the Apple Developer Program. Sure, eventually it is needed to list in the App Store, but why pay for that immediately? Regardless of that, the caveats that change with each version change of Xcode and iOS make it more difficult to achieve what should be simple.
Setup
Most everything in the particular setup is the newest, with the iPhone 13 being only slightly dated.
-
Godot 4.1.1
-
iOS 16.1.1
-
iPhone 13 Pro Max
-
Mac Mini M2 (2023)
-
MacOS Ventura 13.2.1
-
Xcode 14.3
Xcode Apple account setup
- Open Xcode
- Navigate to Settings (from the Xcode menu)
- Click on the Accounts button at the top
- Add an Apple account by clicking the + button
- A team should automatically be created called -Your Name- (Personal Team)
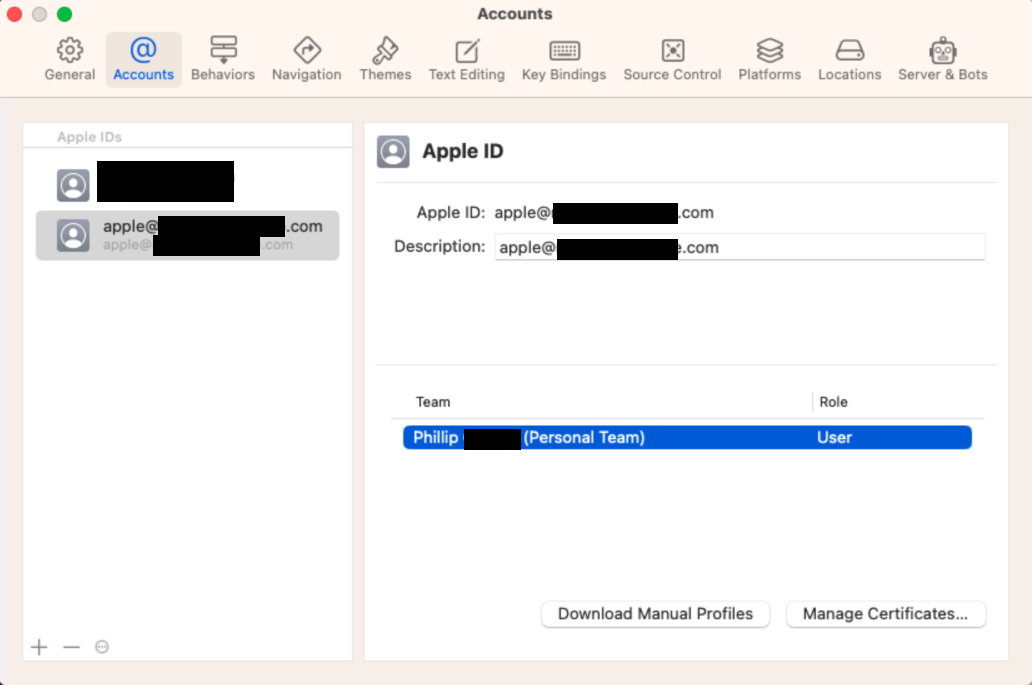
Apple accounts in Xcode
Get the team ID
- Open Keychain Access -- usually easiest to just search for it
- Navigate to the login keychain on the left
- Find Apple Development:
and double lick on it - Within this window, the Organizational Unit is the team ID -- make note of this for the Godot export
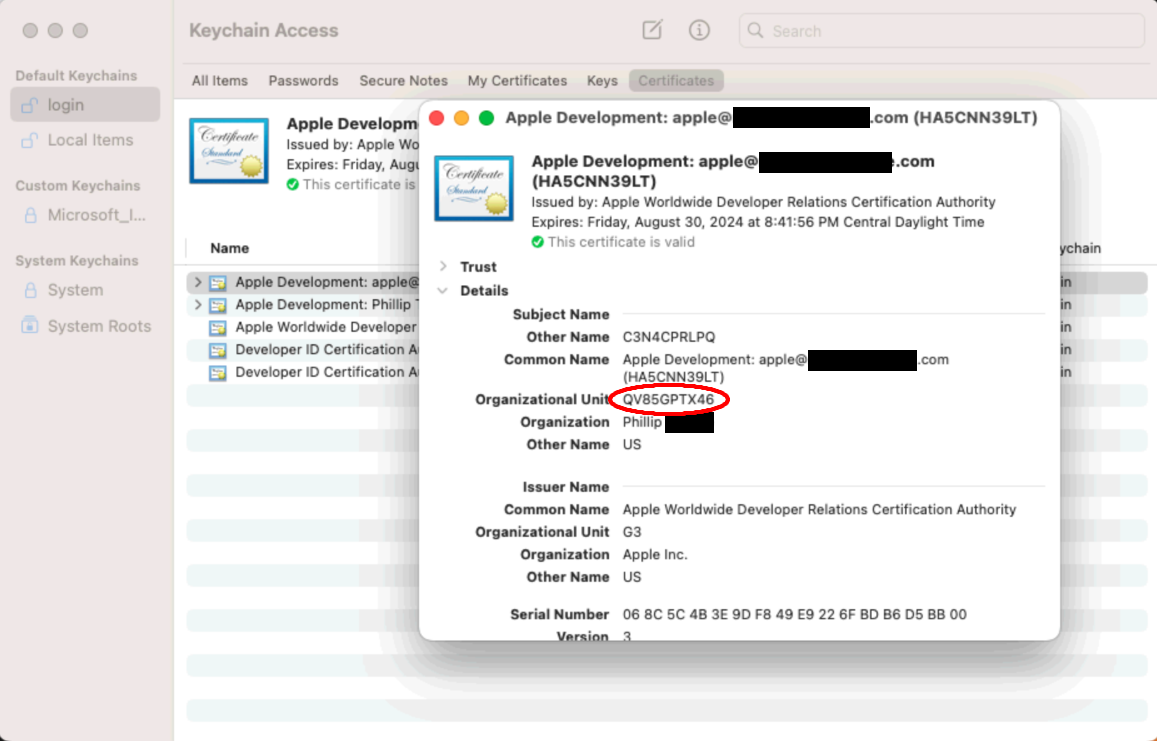
Team ID in Keychain Access
Export Godot project to iOS
- Open Godot with the project to export
- Click the Project menu, then click Export
- Click the Add button at the top, then click iOS
- If the Export Template for iOS hasn't been downloaded, then do that now.
- Click the Manage Export Templates link at the bottom
- Click the Download and Install button on the right
- Click the Close button when the download
- Within the Application section set...
- App Store Team ID to the team ID gathered in the previous section
- Export Method Release to Development
- Bundler Identifer -- make it something unique, likely a good idea to start with your email's domain, in reverse.
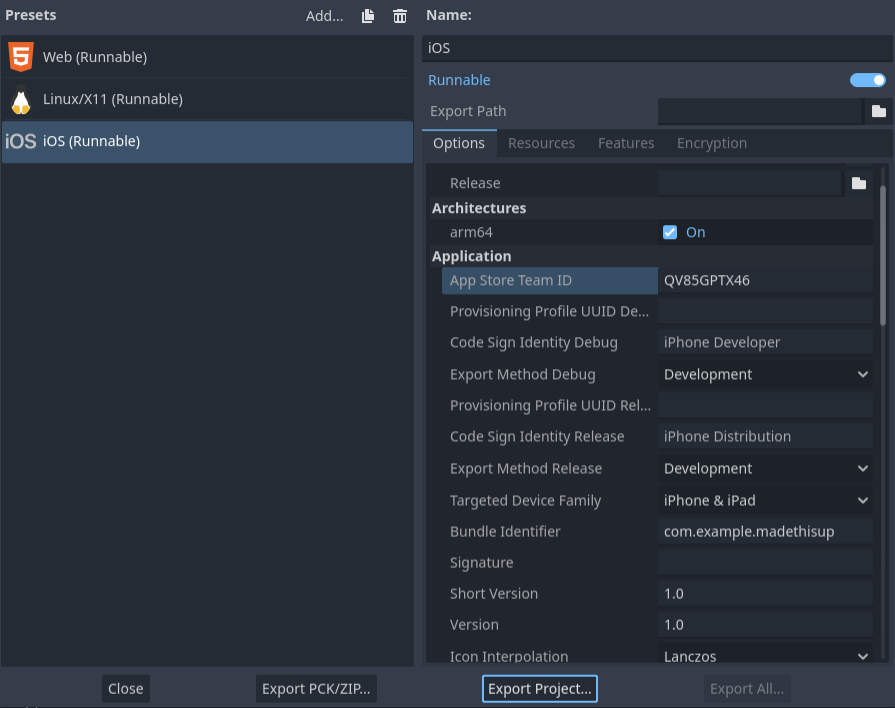
- Click the Export Project button at the bottom
- Navigate to a directory to export the project to
- Click the Save button
Open & launch via Xcode
- Open the exported project in Xcode
- Connect the iOS device to the Mac via USB cable
- On the iOS device, touch Trust
- On the iOS device, enter the device's password to complete the trust relationship
- Follow any additional steps (may need to enable developer mode on the iOS device and restart)
- In Xcode, select the device by clicking the top menu bar, and then clicking on the device within iOS Device
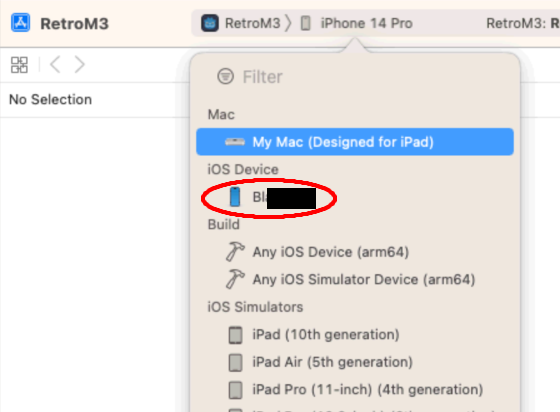
- Hit the start/play button (to the left of the top menu bar)
- After the build completes, enter the Mac's password to sign the application
- On the iOS device, an "Untrusted Developer" message will pop up. Touch Cancel
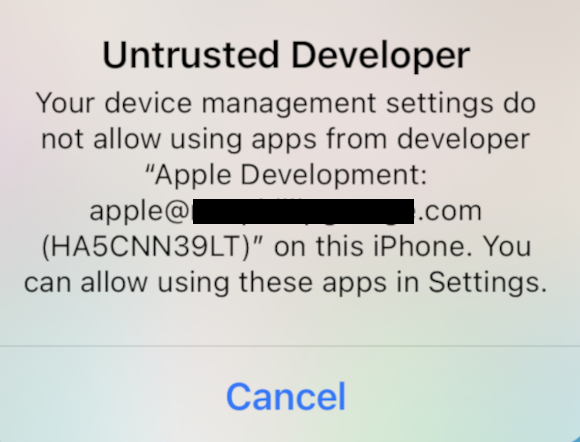
- On the iOS device...
- Go to the Settings app
- Scroll down to and touch General
- Scroll down to and touch VPN & Device Management
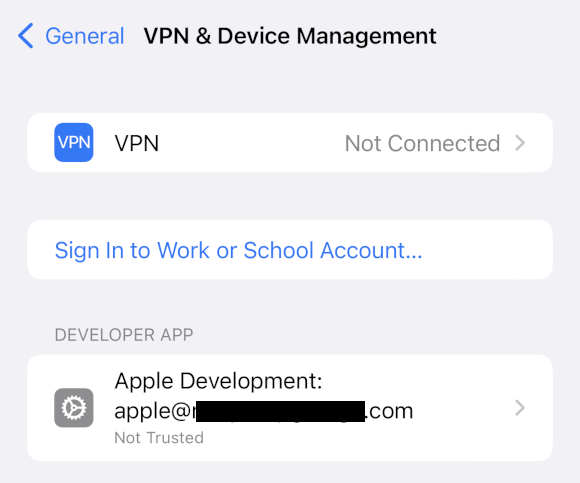
- Touch the Apple Development -your@email.here- button
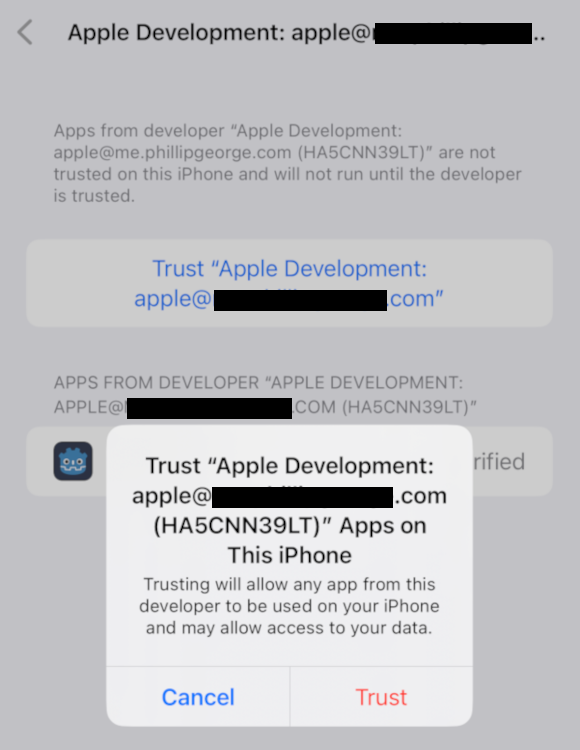
- On the next screen, touch Trust "Apple Deveopment: -your@email.here-"
- Touch the Trust button
- Back on the Mac, click the start/play button again
- Take a look on the iOS device!

Success -- its the game!
Conclusion
Seems like a lot of work. But hey-- this saves $99/year on the Apple Developer Program.